

Step-by-Step Guide on Hosting Your First Website on AWS Using S3 Bucket and CloudFront


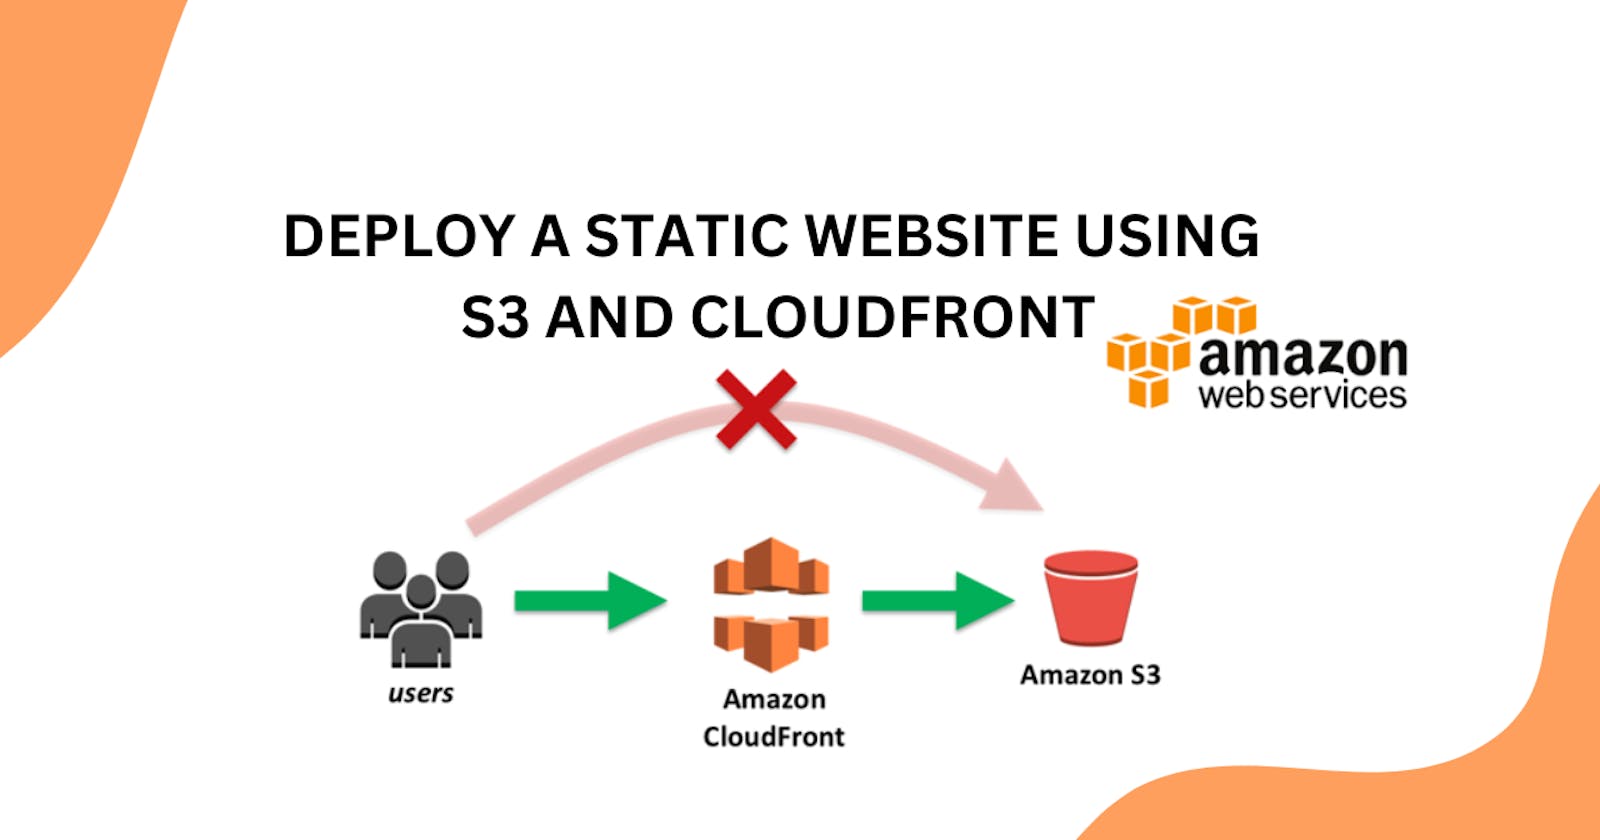
Hosting your website on cloud platform such as Amazon Web Services (AWS) offers scalability, reliability, and global reach. This step-by-step guide will walk you through the process of hosting your first website on AWS using Amazon S3 for storage and Amazon CloudFront as a content delivery network (CDN) to optimize performance.
Prerequisites:
Before you begin, make sure you have the following:
AWS Account: Ensure you have an AWS account. If not, you can create one Here.
DomainName (Optional): If you have a domain name, you can configure it later to point to your CloudFront distribution.
Website Files: Ensure this is ready and working perfectly already.
Step 1: Prepare Your Website Files
Before hosting your website, ensure that your website files (HTML, CSS, JavaScript, images, etc.) are organized and ready to be uploaded to AWS. If you don't have a website yet, you can create a simple one using any text editor.
Step 2: Set Up an S3 Bucket for Website Hosting
Navigate to the AWS and search for S3 .
Click on "Create bucket" to create a new bucket.
Enter a unique bucket name and select the region closest to your target audience for better performance.
Keep the default settings and click "Create bucket."
Once the bucket is created, select it from the list and click on the "Properties" tab.
Stroll down to the end of the page and enable static website hosting by clicking on "Static website hosting" and selecting "Use this bucket to host a website."
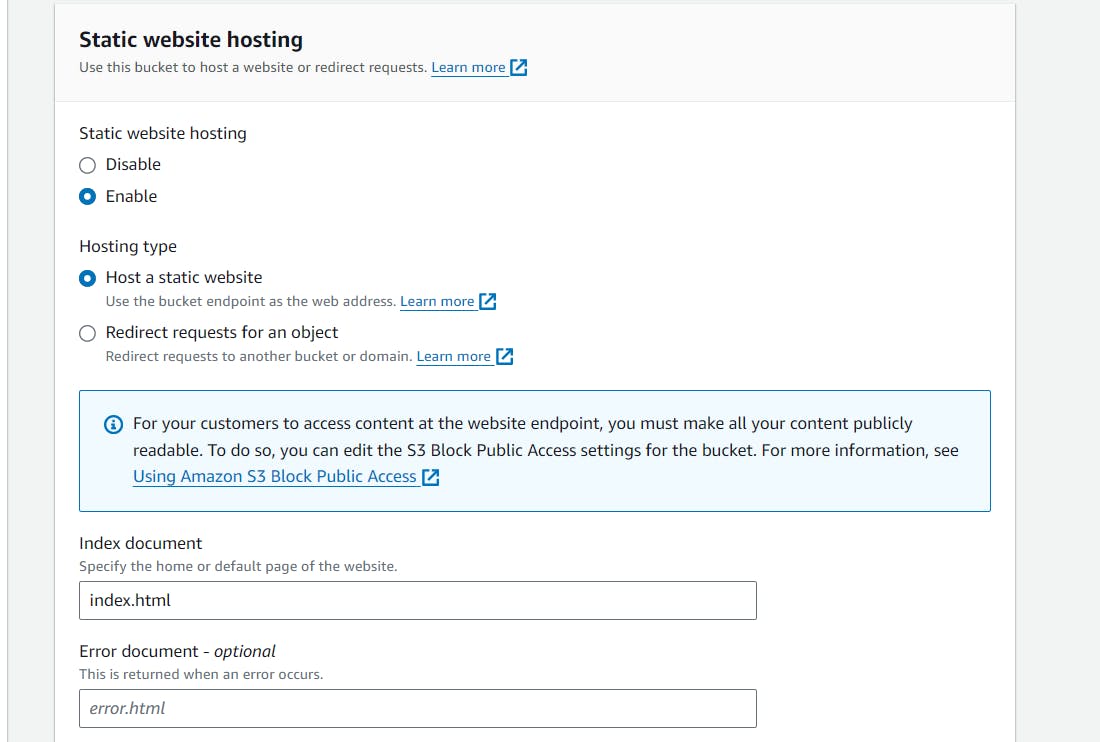
Enter the index document (e.g., index.html) and the error document (e.g., error.html), and ensure they are the same as it is on the application's files
Click "Save."
Open the Properties tap, and Uncheck the Checkbox for "Block all Public Access" and save.

Step 4: Upload Your Website Files to the S3 Bucket
Select the S3 bucket you created earlier.
Click on the "Upload" button.

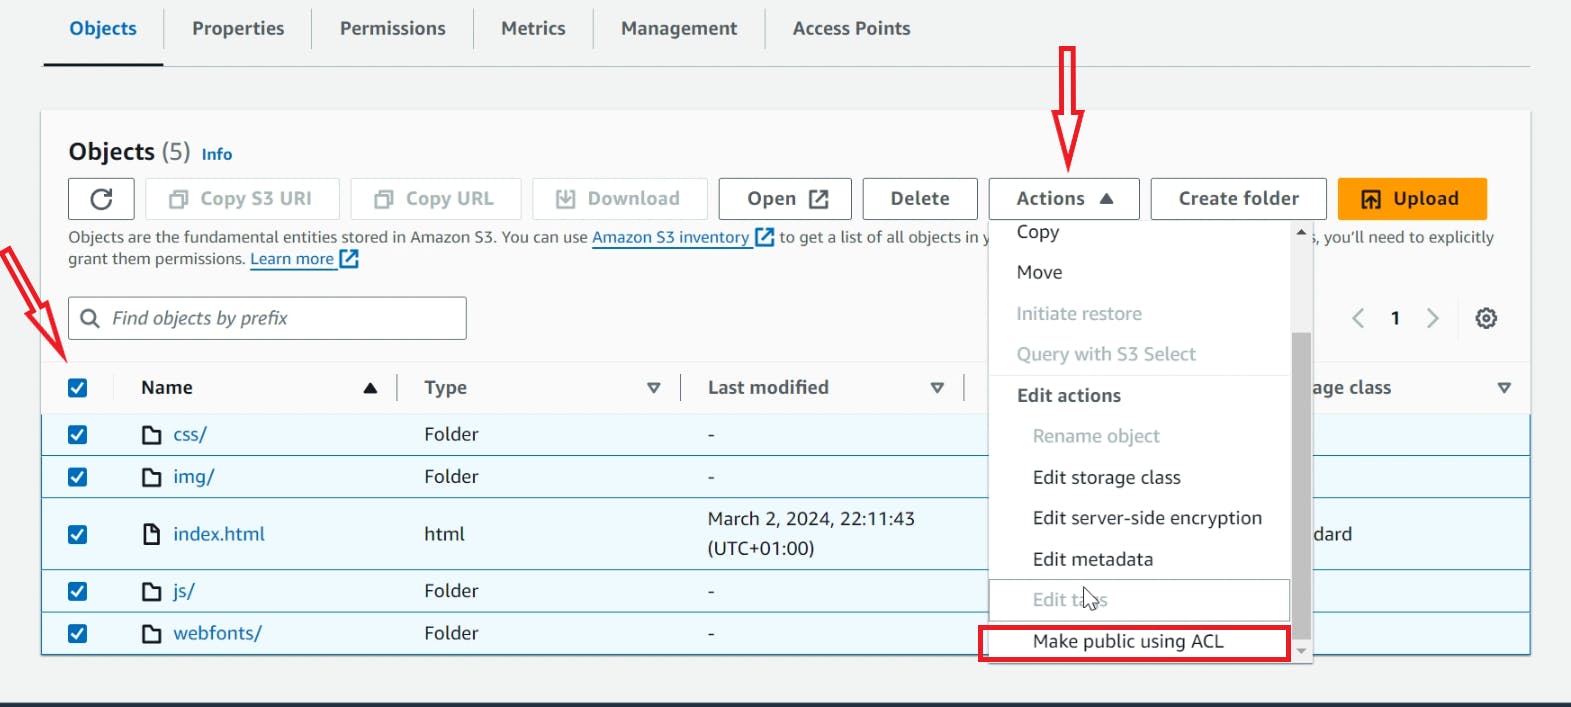
Upload your website files by dragging and dropping them into the S3 bucket or by using the upload dialog.
Once the files are uploaded, make sure they are set to public access. Select the files, click on "Actions," then "Make public Using ACL." if this button is grayed out, follow the steps 3.
Click on the "Access Points" Tab and click Create Access Points.
1. Access point name - Enter preferred name
2. On the Network Origin - select Internet
3. Uncheck the Block all Public access box and hit the Create button
Return to Step 2 Above and make all Objects file Public
Step 5: Configure Amazon CloudFront Distribution
Navigate to the Amazon CloudFront console.
Click on "Create Distribution." Choose the S3 Bucket as the Origin Domain and use the Website Endpoint

Leave other settings as default or configure them according to your requirements.
Click "Create Distribution."
Step 6: Update DNS Settings (Optional)
If you have a custom domain, you can update your DNS settings to point to your CloudFront distribution.
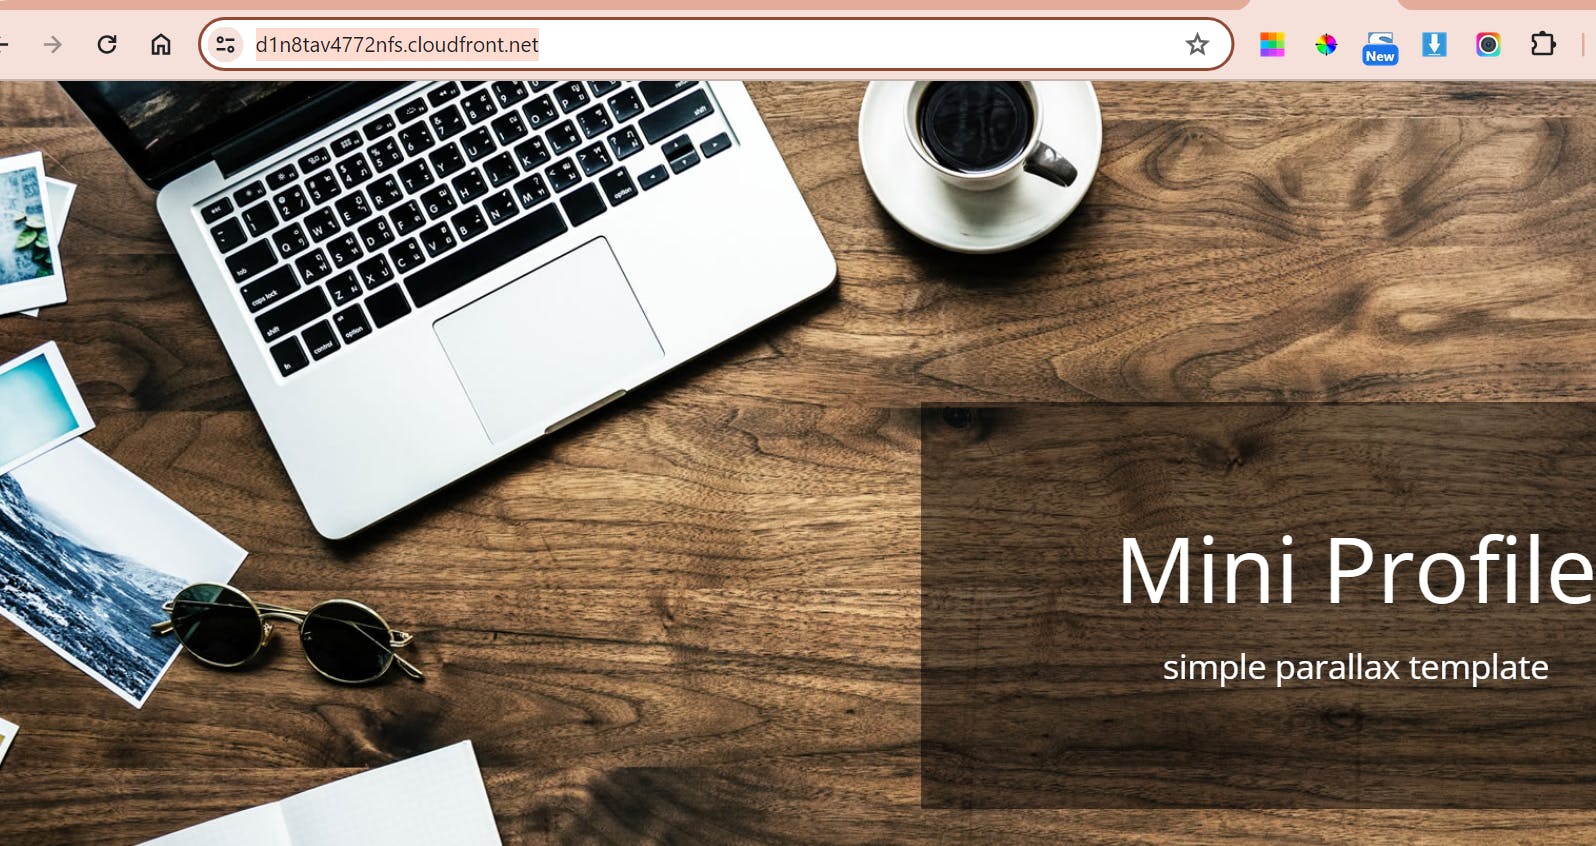
Obtain the CloudFront distribution domain name from the CloudFront console. This domain end with cloudfront.net eg d1n8tav4772nfs.cloudfront.net
Update your DNS settings with a CNAME record pointing to the CloudFront distribution domain name. This should be done from your domain register's end.
Step 7: Test Your Website
Once the CloudFront distribution is deployed (which may take a few minutes), you can access your website using the CloudFront domain name or your custom domain (if configured).
Test your website by visiting the URL in a web browser to ensure that everything is working as expected.
Resources:
Watch the YouTube video Guide - https://youtu.be/KRUm5v5bYf8