

How to Set Up a LEMP Stack for Your Web Project


Setting up a LEMP stack (Linux, Nginx, MySQL, PHP) is a common choice for hosting dynamic web applications. In this step-by-step guide, we'll walk through the process of setting up a LEMP stack on a Linux server and preparing it for your web project.
Step 1: Set Up a Linux Server
Choose a Linux distribution for your server. Popular choices include Ubuntu and CentOS. For this guide, We will be using the Ubuntu 22.04 instance from AWS. Once you have your server up and connected, run the apt update command as shown below
sudo apt update && sudo apt upgrade
Step 2: Install Nginx
Nginx will serve as your web server. Install it using the package manager:
sudo apt install nginx
Start and enable Nginx:
sudo systemctl start nginx
sudo systemctl enable nginx
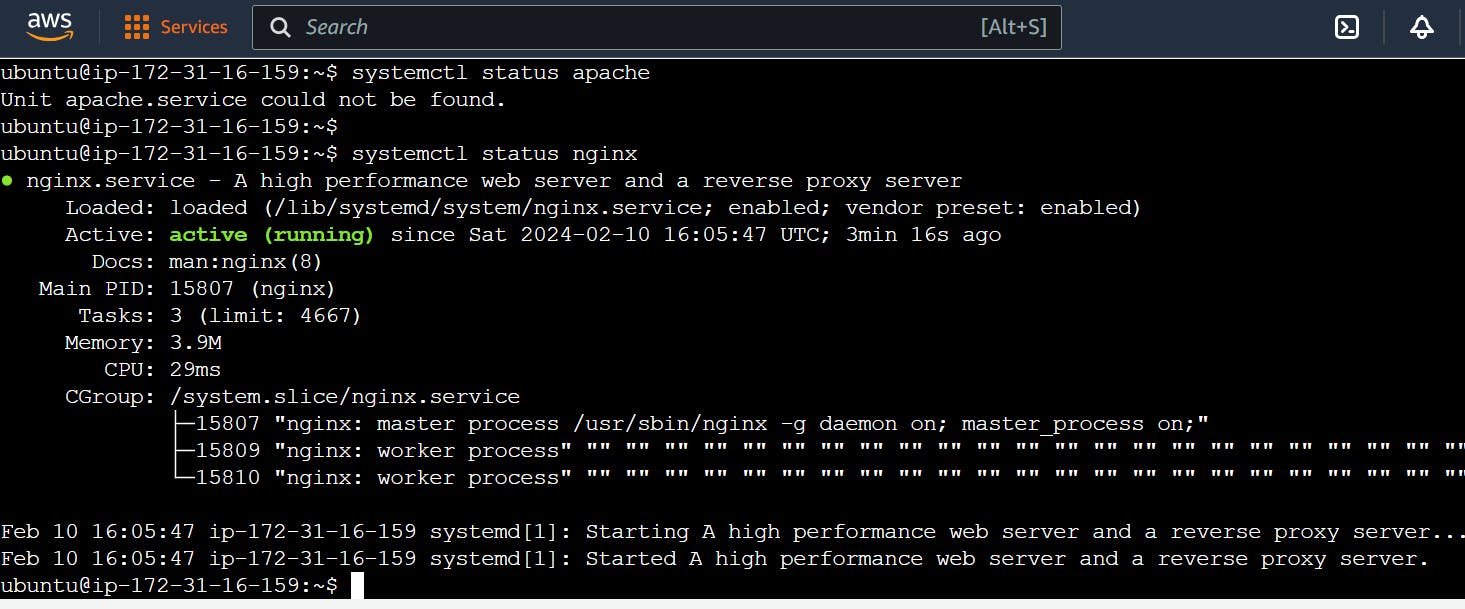
sudo systemctl status nginx
Confirm that Nginx is running
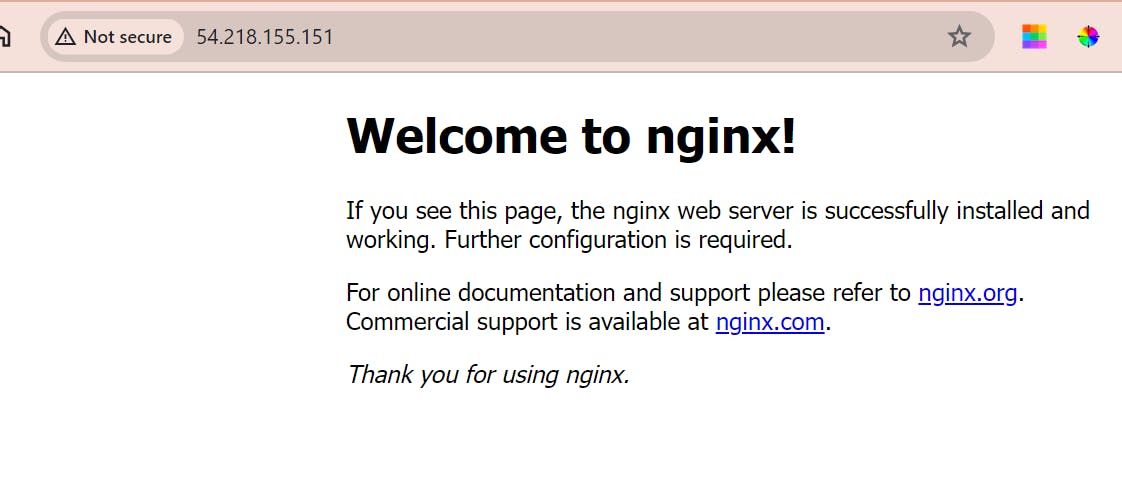
The server is running and we can access it locally and from the Internet but to access it from the Internet port 80 must be open to allow traffic from the Internet in.
The server is running and we can access it locally and from the Internet but to access it from the Internet port 80 must be open to allow traffic from the Internet in.
To test that the server can be accessed from the internet, open a browser and type the following URL with the public IP of your Ubuntu instance; http://Public-IP-Address:80 Ensure port 80 is accessible on your server set up
Step 3: Install MySQL
Install MySQL Install it and secure the installation
To acquire and install SQL run: sudo apt install mysql-server in the terminal.
At the prompt, confirm installation by typing Y and enter to proceed.
  sudo apt install mysql-server
  sudo systemctl start mysql
  sudo systemctl enable mysql
Next, Run the interactive script by typing sudo mysql_secure_installation and following the instructions as shown:
sudo mysql_secure_installation

Log into MySQL: sudo mysql
Next, run a security script that comes pre-installed with MySQL, to remove some insecure default settings and lock down access to your database system. run: ALTER USER 'root'@'localhost' IDENTIFIED WITH mysql_native_password BY 'PassUserMe.1'; then exit MySQL shell by typing \q and enter.
ALTER USER 'root'@'localhost' IDENTIFIED WITH mysql_native_password BY 'PassUserMe.1'test that login to MySQL console works. Run: sudo mysql -p and enter your Password

Step 4: Install PHP
Install PHP and the necessary modules to connect PHP with Nginx and MySQL, To install these 3 packages at once, run: sudo apt install php libapache2-mod-php php-mysql:
sudo apt install php libapache2-mod-php php-mysql
Start and enable PHP:
sudo systemctl start php-fpm
sudo systemctl enable php-fpm
Step 5: Configure Nginx to Work with PHP
Edit the Nginx server block configuration to process PHP files. Open the default configuration file or create a new one:
sudo nano /etc/nginx/sites-available/default
After installation is done, run the following command to confirm your PHP version: php -v
Create a root directory for your web file , I will call mine - handsonwebserver at this location /var/www/handsonwebserver
Next, assign ownership of the directory with the $USER environment variable, which will reference your current system user: sudo chown -R $USER:$USER /var/www/handsonwebserver
open a new configuration file in Nginx’s sites-available directory using your preferred command-line editor. Here, we’ll use nano: sudo nano /etc/nginx/sites-available/handsonwebserver
Add or modify the following lines inside the server block:
server {
    listen 80;
    server_name projectLEMP www.projectLEMP;
    root /var/www/handsonwebserver;

    index index.html index.htm index.php;

    location / {
        try_files $uri $uri/ =404;
    }

    location ~ \.php$ {
        include snippets/fastcgi-php.conf;
        fastcgi_pass unix:/var/run/php/php8.1-fpm.sock;
     }

    location ~ /\.ht {
        deny all;
    }
}
Restart Nginx to apply the changes:
sudo systemctl restart nginx
Step 6: Test Your LEMP Stack
Create a simple PHP file to test your LEMP stack. Create a file named info.php in your Nginx web root directory (usually /var/www/html or /usr/share/nginx/html):
sudo nano /var/www/html/info.php
Add the following content:
<?php
phpinfo();
?>
Save and close the file. Open your web browser and navigate to http://your_server_ip/info.php. You should see the PHP information page, confirming that your LEMP stack is working correctly.